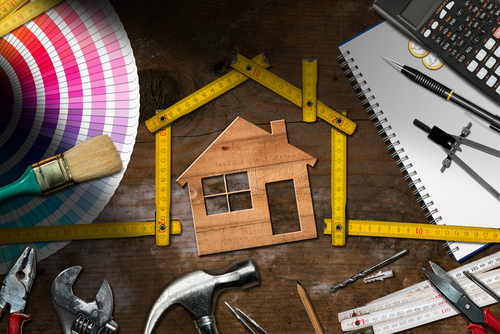
What can seem like a simple project can quickly escalate into a large one if things don’t go as planned, even skilled professionals often find unforeseen problems when they get into a job. DIY home improvements can be fun and cheap but you want to do it right.
Firstly, you want to start with simple projects suitable to your skill level. For example, replacing a towel heating rack in your bathroom looks an easy job, but what if a piece of plaster comes off when removing the existing towel rack? Plumbing can also be a bit tricky.
First and foremost, make sure you have the tools on hand, you don’t need a big expensive tool kit but try to get the basics. Hammer, screwdriver (Phillips and flat head), tape and adjustable wrenches. Also, you might be best served getting an electric screwdriver, they are cheap but can make a huge difference.
Once you decide on your next home DIY home improvement do your research, YouTube can be a great place to get detailed walk-throughs showing you exactly how to do it.
Cheap and easy DIY simple home improvements
1. Give Your Home a Fresh Look with a Budget-Friendly Lick of Paint
You can paint nearly everything in your home, from your whole house to just a feature wall, interior or exterior. Can’t afford to revamp your kitchen? Paint the existing cabinets.
Painting is one of the easiest and most affordable ways to breathe new life into your home. With proper prep and the right supplies, you can transform any room on a modest budget.
Start by cleaning surfaces and repairing any cracks or holes. Use painter’s tape and dust sheets to protect floors, trim, and furniture. Primer allows the paint to adhere better, especially on shiny or stained surfaces. Opt for decent quality brushes – the £8-12 price tag is worth easier application and cleaner lines. Match the brush size to the area being painted. For large expansive walls, use rollers and wider brush heads to speed up the process.
Think beyond just walls – paint metal cabinets to modernise a kitchen or give exterior cladding a protective new coat. Rust-oleum spray paint also works wonders for smaller DIY projects like furniture makeovers. With a little elbow grease, you can give nearly any surface a fresh new look for under £80.
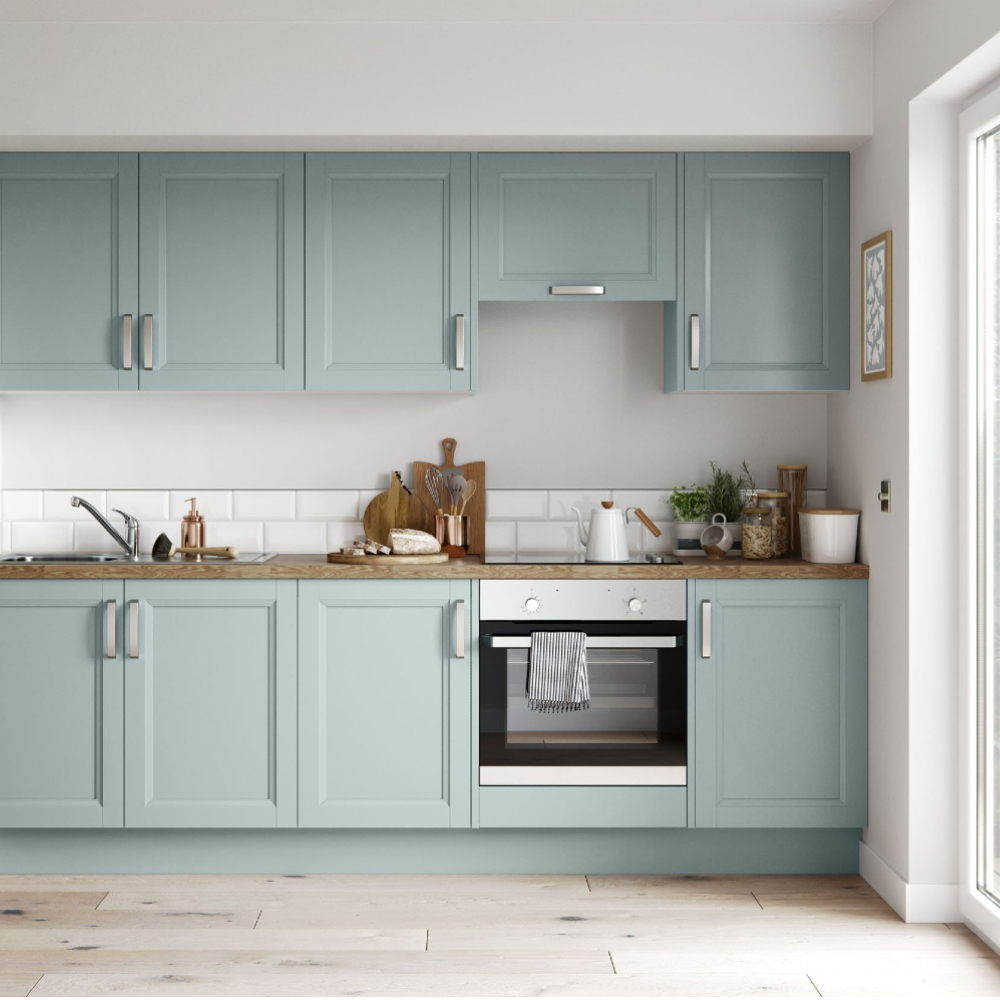
2. Change the hardware in your kitchen or bathroom
This is one of the easiest and simple home improvements you can do and requires little skill. By adding new hardware to your kitchen and bathroom will make a quick improvement and freshen them up nicely. To save yourself extra work take note of the distance between the existing fitting holes or better yet take your current hardware with you when shopping for new, to make sure it will fit.
Check out our recent article on Kitchen Cabinet Knobs and handles.
3. Update your light fixtures
Firstly its an extremely easy task and can easily modernize each room with a new light fixture or even shade. Also consider changing the bulbs, you could save money with LED bulbs but also get different warmth’s of light which is measured in kelvins. You might want a warmer feel in the living room but a modern bright white in the kitchen. Learn more here.
- Soft white – 2,700 to 3,000 kelvin
- Warm white – 3,000 to 4,000 kelvin
- Bright white – 4,000 to 5,000 kelvin

4. Seal Out Drafts with Weatherstripping and Caulking
Stopping air leaks is one of the most effective ways to increase your home’s energy efficiency. Luckily, it’s also an easy and affordable DIY project.
Weatherstripping creates a seal around movable joints like doors and windows to stop drafts. Self-adhesive foam strips come in various thicknesses – pick a thickness that compresses nicely when the door or window is closed. For stationary cracks and gaps, use caulk to fill and seal. Acrylic latex caulks are easiest to apply and clean up afterwards with just soap and water.
Take a walk around your home and look for potential air leaks – you’ll likely find plenty around old doors and windows. A £10 kit of weatherstripping and a £3 tube of caulk can make a big difference in sealing out drafts and reducing your heating bills. Proper sealing can keep rooms warmer and make your home more comfortable.
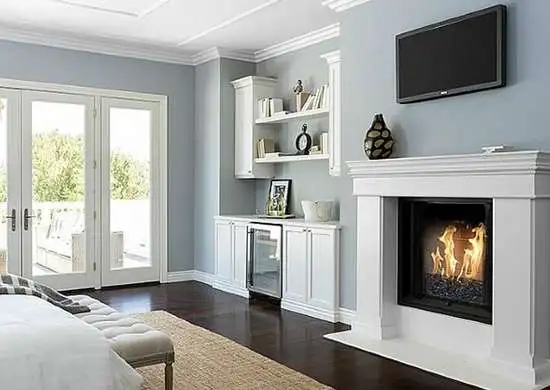
5. Add Character with DIY Crown Moulding
Installing crown moulding is a straightforward way to give your rooms a more polished, finished look. Most DIY stores stock a variety of decorative mouldings. Pine is an affordable option that’s easy to cut and paint.
Measure the room’s perimeter and cut the moulding to size with a mitre saw. For the cleanest joins, take time to position and secure the mitre joints correctly. Use a nail gun or strong wood glue to attach the moulding to the wall and ceiling. Fill any gaps with filler before painting.
Crown moulding does require some precision, so watch online tutorials to master proper measuring and cutting techniques. The finished product lends an elegant, designer touch to your space. With a little skill and patience, you can add character to any room for less than £100.
6. Reveal and restore hardwood floors
Many homes particularly older homes will likely have hardwood floors hidden beneath the carpet or laminate flooring. Squeaky floors can usually be a good sign you have wood floors, but you can always pull up your carpet in the corner to check. To restore them you will want to clean them down, sand them and apply a finish. This can give your room a completely new look and hardwood floors are extremely durable.
7. Clean the exterior of your home
Firstly you can clean out your gutters, this more maintenance than an improvement but its still essential. Power washing the exterior of your home is a cheap option to bring it back to life. You could also include driveways, patios and walkways in this to get it looking like a new home. All you need is a power washer for this DIY Home improvement.
8. Insulate your loft
Installing insulation in your loft is one of the most effective and straightforward ways to improve your home’s energy efficiency. As long as you have no issues with damp or condensation, it’s a great DIY project for UK homeowners.
Roll insulation, also known as mineral wool, is inexpensive and readily available at most hardware stores. Simply roll it out over the existing floor of the loft space. Leave a small gap around pipes and make sure not to block ventilation points. There are many online tutorials demonstrating proper installation.
Adding just 270mm of mineral wool insulation can reduce heat loss through the roof by up to 60%. This in turn can lower your heating bills by £100-250 per year. The materials for insulating an average loft will only set you back around £200-300 – so your investment will quickly pay for itself in energy savings! Just be sure to wear goggles and a mask when handling the insulation.
9. Upgrade plug sockets and light switches
Replacing outdated or worn electrical fittings is a relatively straightforward DIY task for the safety-conscious homeowner. Start by switching off power to the circuit you’ll be working on at the consumer unit. Remove the old socket or switch and carefully disconnect the wires.
When installing the new fitting, ensure you connect the wires correctly according to the manufacturer’s instructions. The earth wire always goes to the terminal marked with E or green/yellow. Take photos along the way to help with reassembly.
As well as improving safety, new sockets and switches can enhance style. Sleek brushed steel or chrome finishes lend a contemporary look. Integrated USB ports add functionality. And dimmer switches give you greater lighting control. Just take care to avoid overloading sockets with too many appliances. With the power off and some common sense, upgrading your electrics is an easy way to add both style and safety.
10. Installing New Garden Turf
Your garden might have been neglected for a while, or you just simply want to give it a refresh. Either way, there are a number of reasons why you could replace your current lawn, and it isn’t actually as tricky as you might think.
Naturally there is a bit of graft needed to begin with, such as preparing the soil, levelling your garden if it’s a little uneven or on a slope – but once that’s complete, all you need to do is buy lawn turf that suits your requirements. For example, you could choose natural grass or go down the low maintenance route of artificial turf.
Most importantly, this is certainly a project you can handle yourself and so long as it’s not a large space, you can get it completed in a weekend.
Advanced DIY home improvement projects
Ready for a greater challenge? Try one of these more complex DIY upgrades.
1. Built-In Shelving
Built-ins can greatly expand storage and give a custom look. Planning is key – decide on design, required tools, and wood type (plywood vs. hardwoods).
Expect to spend £200-400 for a 4-5 ft built-in for a standard wardrobe. Set aside a full weekend for construction and installation. Have an extra set of hands to help position the finished unit.
2. Tile Installation
Tiling bathroom or kitchen walls and floors will add natural stone beauty and durability. Purchase the necessary tools if you don’t own them already – tile cutter, spacers, grout float, etc. For a standard 3×5 ft bathroom floor, expect to pay £150-450 for tile and supplies.
Allocate 1 full weekend for about 20 sq ft of floor tile installation. Ensure the subfloor is smooth and clean before applying tile adhesive.
3. Refinishing Hardwood Floors
Revealing natural wood floors can help any room look instantly refreshed. After removing existing carpet and cleaning, hire a drum sander and edge sander to sand floors smooth (£30-75/day).
Apply 2-3 coats of varnish, degreasing and resanding between coats (£80 for materials). With proper prep, a typical 4x5m room takes 1 full weekend.
DIY home improvements overview
With proper planning and research, DIY home improvements can greatly enhance your living space. For helpful video tutorials on the projects above and more, check out these YouTube channels – DIY Pete, Home RenoVision, House Improvements. And don’t be afraid to start small as you build your home improvement skills. The satisfaction of completing projects yourself is well worth the effort.
Don’t want to ‘do it yourself’?
As well as DIY home improvements The Home Improvement Hub also has an array of information on some of the most popular home improvements such as Double glazing, Boiler replacement and Conservatory roof replacements.